Wow, I have been gone for awhile!
Life just got crazy.
So hopefully 2012 will bring lots of organization and lots of fun little projects around the house. And maybe a little Christmas crafting in July for it just didn't happen before the holiday!
My friend dubbed it "the year of peace" and I'm hoping she's right. The last few months have been stressful and 2012 just has to be better! I need to get my "sparkle" back and I need a little crafting/scrapping/decorating mojo to help me along.
First up is to get this office in working order. It's a mess. I mean filthy, unorganized, over-crowded, filled with crap I wasn't sure where to put. Time to purge, clean, paint and make it sparkle. Literally!
Happy 2012!
Wednesday, December 28, 2011

Friday, November 11, 2011
Easy Faux Roman Shades
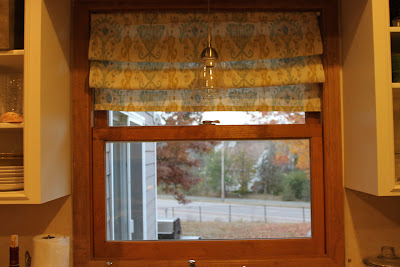
I have been trying to get my kitchen put back together the way I would like it since giving my cabinets a face lift. One thing I have been putting off is window treatments for the one small window. I have never had them for this window but since painting the cabinets white, I wanted to add just a hint of color! I searched hi and low for some pre-made ones but nothing that I liked. And then I saw this on Tatertots & Jello...


And so easy to do! You can easily follow her steps or check out my pictures below. I already had the fabric, I want to make some throw pillows from it. I have plenty so I measured my window and went to work!
 1. Cut your fabric to fit your window, giving yourself about an inch extra on each side. I purchased the tension rods from Target, Heat and Bond from Joanns.
2. Place heat and bond about an inch below fabric. I first ironed about a one inch hem. The directions on the back of the Heat and Bond are very easy to follow, this was my first time using it.
3. & 4. Iron fabric down, gently folding a small piece in to create a nice clean edge. Sorry, this picture sucks...




I thought to myself, I could totally do that!!!
But then saw the stencil price tag and decided I'm too cheap. But towards the end of her post, she mentioned this website, Imparting Grace. So I clicked away and LOVED what I saw!

And so easy to do! You can easily follow her steps or check out my pictures below. I already had the fabric, I want to make some throw pillows from it. I have plenty so I measured my window and went to work!

2. Place heat and bond about an inch below fabric. I first ironed about a one inch hem. The directions on the back of the Heat and Bond are very easy to follow, this was my first time using it.
3. & 4. Iron fabric down, gently folding a small piece in to create a nice clean edge. Sorry, this picture sucks...

5. For the top edge, I wanted to have a space to slide the tension rod in. So I made a hem about 2 inches (sorry, I was working upside down on my ironing board, this is the top part of the shade).
6. I measured about an inch from where I ironed to figure out where I wanted the Heat & Bond to go. Then I carefully ironed that seam, making sure I had at least an inch opening for my tension rod.
Once all the seams were cooled, I hung my shade using 1 tension rod.

I then placed another tension rod about 4 inches below the top one. And then the last tension rod about 4 inches below that one. I then "roman-ized" my shade to my liking, adjusting the distance between the tension rods until I liked what I saw (sorry, forgot to take a picture of that part).
Voila! Easy Faux Roman Shade!! In less than an hour!

And here's one with my lovely vintage light on!

Monday, November 7, 2011
Changes are happening!
Yea for fall! And yea for crossing a few items off my long to-do list!
paint A's big girl roomorganize kid's closet
organize pantry
paint mudroom/build lockersadd some bling and accessories to piano roomfinish organizing master closet
paint vanity in kid's/guest bathroomconvince husband master bedroom needs a face lift
purge toys in playroom and organize
figure out what to put over the couch...the wall has been sitting empty for 9 months already.
office/craft room needs help. lots of it. might have to save that for 2012!
So I guess I really haven't done as much as I would like but that's a start! I painted Ava's room but need to finish it, the ribbon stencil was a complete fail (I love how idea pamphlets seem so much easier than they really are!).
Hopefully I can get a few more things done before Thanksgiving! And then lots more as we enter 2012!!
So I guess I really haven't done as much as I would like but that's a start! I painted Ava's room but need to finish it, the ribbon stencil was a complete fail (I love how idea pamphlets seem so much easier than they really are!).
Hopefully I can get a few more things done before Thanksgiving! And then lots more as we enter 2012!!
Monday, October 31, 2011
Locks for Love!
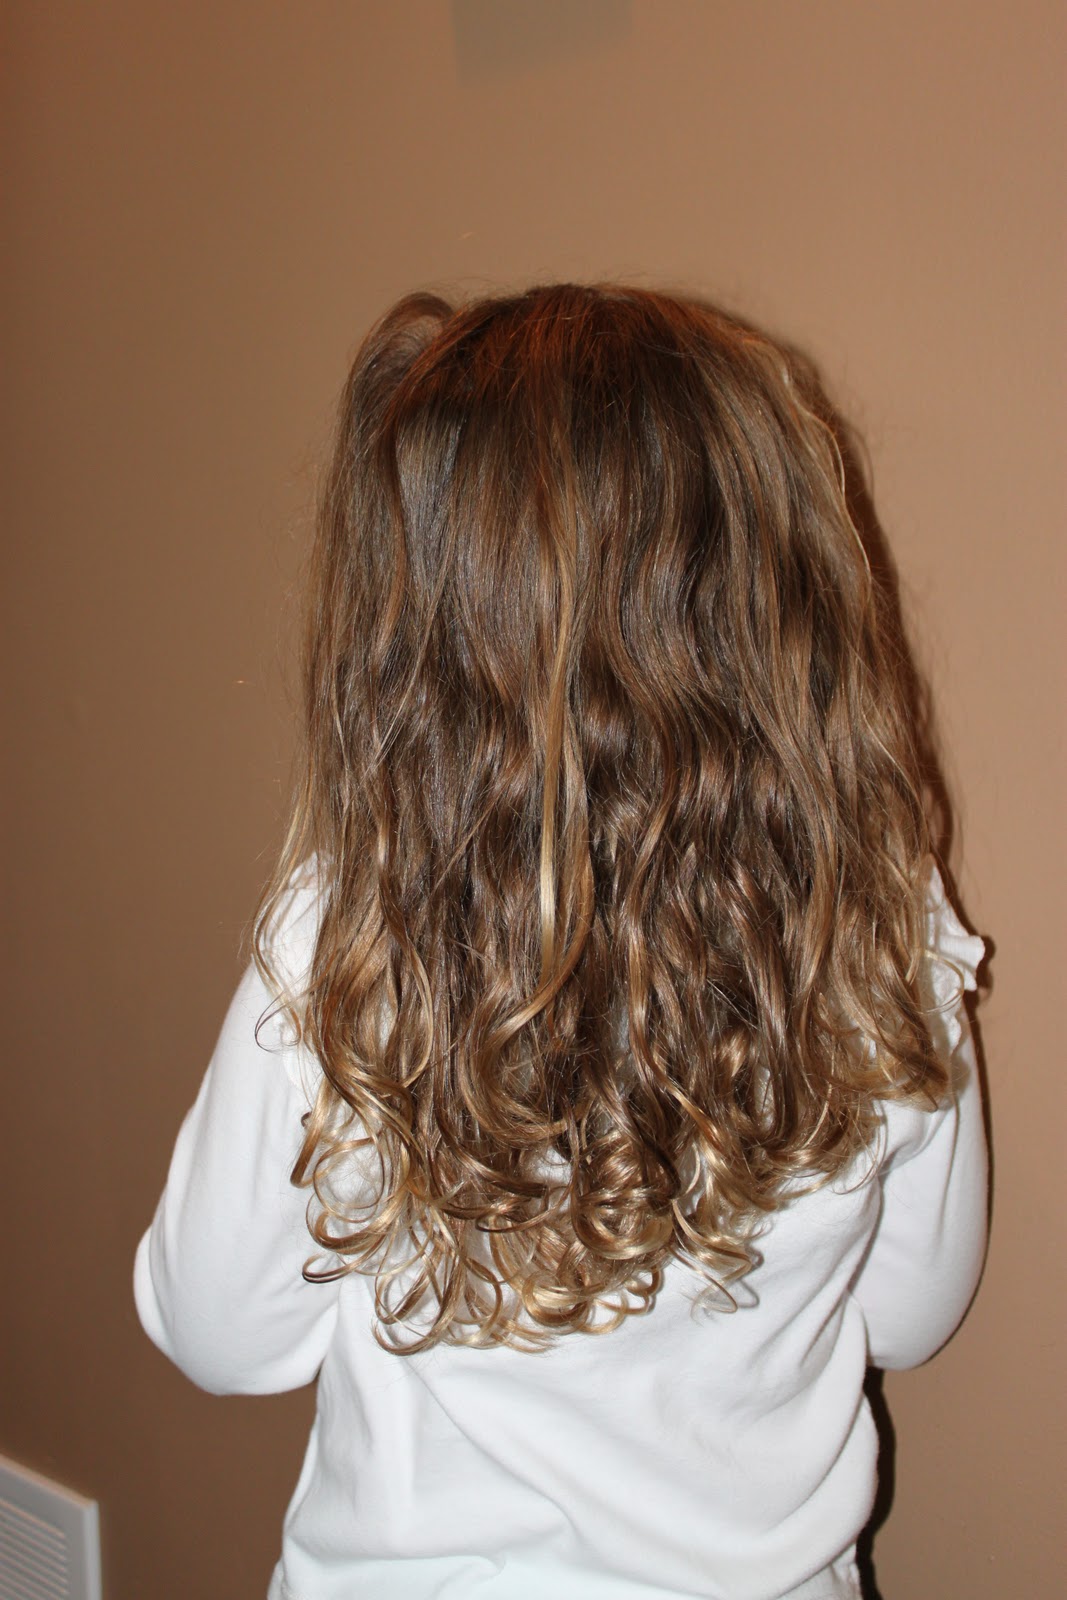
I have to say, my daughter has the most gorgeous hair you have ever seen. It's long. It's thick. And it has the most beautiful natural curls.

But she hates it. Or I should say, she hates having it combed. Which means we are pretty limited on what we can do with it for she freaks out when she sees a pick, a comb or brush. We go through lots and lots of leave-in conditioner and she still cries every time we need to pick through it.
She has been begging me to cut it off for months. So I told her once it was long enough to donate (because how can you NOT donate this mane of gorgeousness!!), we'd get it cut.

I might have shed a tear or 2 upon seeing her beautiful curls being cut...... But like my very smart 5 year old daughter told me, "it will grow back, mommy."


But she hates it. Or I should say, she hates having it combed. Which means we are pretty limited on what we can do with it for she freaks out when she sees a pick, a comb or brush. We go through lots and lots of leave-in conditioner and she still cries every time we need to pick through it.
She has been begging me to cut it off for months. So I told her once it was long enough to donate (because how can you NOT donate this mane of gorgeousness!!), we'd get it cut.

I might have shed a tear or 2 upon seeing her beautiful curls being cut...... But like my very smart 5 year old daughter told me, "it will grow back, mommy."

She's still beautiful and so wise beyond her 5 years!!

Monday, October 17, 2011
Tissue Poms Tutorial
I'm having so much fun getting my daughter's big girl room put together! I have finished painting the walls, however, the ribbon stencil just didn't go as planned. So I'm not sure what I'll do about that. :)
I've seen adorable tissue poms all over the party planning blogs and thought, these would be so cute as bedroom decor! Etsy is overflowing with premade ones but those were a little out of my budget. So I enlisted in my trusty googling skills and found a great tutorial here.
I went to a few stores to find the colors I wanted. I gathered up my supplies and went to work!

For the first pom, I used all 9 sheets of the light green tissue. And did not cut them down, I wanted a larger pom. I started on one side and folded the sheets like an accordion, about an inch wide. I secured it in the center with white covered floral wire that I picked up at Michael's. Next, I rounded the ends of each side. You could do a heart, triangle or whatever look you are going for. I wanted something soft for these poms.


I've seen adorable tissue poms all over the party planning blogs and thought, these would be so cute as bedroom decor! Etsy is overflowing with premade ones but those were a little out of my budget. So I enlisted in my trusty googling skills and found a great tutorial here.
I went to a few stores to find the colors I wanted. I gathered up my supplies and went to work!

For the first pom, I used all 9 sheets of the light green tissue. And did not cut them down, I wanted a larger pom. I started on one side and folded the sheets like an accordion, about an inch wide. I secured it in the center with white covered floral wire that I picked up at Michael's. Next, I rounded the ends of each side. You could do a heart, triangle or whatever look you are going for. I wanted something soft for these poms.


I then started to slowly separate the tissue apart. I had a few rips but you can't tell at all once they are hanging! I carefully attached my choice of ribbon (you probably could hang them with the white covered floral wire too but I wanted a little bling). I'm assuming there must be an easier way to do this which is why I didn't take a picture.... I made 2 smaller balls, I just trimmed the larger sheets to a size I wanted. Hang and admire their prettiness!

Sunday, October 9, 2011
Easy Fall Wreath
I have always wanted a fall wreath on my door but wasn't a fan of the fake-flower-over-the-top wreaths that I have stumbled upon at various stores. There are a lot of yarn type ones all over blogland but those just looked like too much work. :) I knew I wanted just a bit of fall foliage and some hand-made-goodness!
So I found a pre-made twig wreath at Michaels (or Joanns...who can remember where one gets her crafty stuff these days?). I gathered my supplies and went to work.

I googled "felt rosettes" to get an idea on how I wanted my flowers to look. I had bought a fabric rosette necklace on etsy for way too much money and it broke the first time I put it on. Which is fine, I looked ridiculous in it.... But I thought the flowers were cute so I hung on to it, I knew I could eventually use it somehow!
I first cute my felt into various sized squares. And then into circles. I gradually went around in a loop so I had almost a snake looking piece of felt which made a perfect circle if I put it back together. I was going to attempt another type of felt rosette with the long strips of felt but I didn't like how they turned out so I scraped that idea!

I then started wrapping the felt into a rosette and placing little dots of clear tacky glue along the way. I then hot glued it on a small circle of felt.

Once completely dry, I set up the rosettes and simple-but-sparkly fall foliage I found on sale at Michaels on the wreath. Once I liked the layout, I tucked the foliage where I wanted it to stay and hot glued the rosettes on to the wreath! Voila! Fall Wreath is complete!

So I found a pre-made twig wreath at Michaels (or Joanns...who can remember where one gets her crafty stuff these days?). I gathered my supplies and went to work.

I googled "felt rosettes" to get an idea on how I wanted my flowers to look. I had bought a fabric rosette necklace on etsy for way too much money and it broke the first time I put it on. Which is fine, I looked ridiculous in it.... But I thought the flowers were cute so I hung on to it, I knew I could eventually use it somehow!
I first cute my felt into various sized squares. And then into circles. I gradually went around in a loop so I had almost a snake looking piece of felt which made a perfect circle if I put it back together. I was going to attempt another type of felt rosette with the long strips of felt but I didn't like how they turned out so I scraped that idea!

I then started wrapping the felt into a rosette and placing little dots of clear tacky glue along the way. I then hot glued it on a small circle of felt.

Once completely dry, I set up the rosettes and simple-but-sparkly fall foliage I found on sale at Michaels on the wreath. Once I liked the layout, I tucked the foliage where I wanted it to stay and hot glued the rosettes on to the wreath! Voila! Fall Wreath is complete!

Friday, September 30, 2011
Little Blue Pumpkins
I spotted these super cute pumpkins recently in blogland and knew I had to create my own! I love the non-traditional color and these will work perfect for Halloween and fall.
This was my first time using crackle medium and I loved how it all turned out (although I spotted Martha Stewart Crackle paint at Home Depot and am wondering if it would have the same effect?)
The supplies are simple: $1 store pumpkins and squash (I also picked up a bag of small ones), black spray paint, crackle medium and acrylic paint.


Here they are on in my house. I don't have a fun mantel to decorate each season but I do have a piano so that is their current resting spot! :)

This was my first time using crackle medium and I loved how it all turned out (although I spotted Martha Stewart Crackle paint at Home Depot and am wondering if it would have the same effect?)
The supplies are simple: $1 store pumpkins and squash (I also picked up a bag of small ones), black spray paint, crackle medium and acrylic paint.


Spray your pumpkins with a few light coats of black spray paint (I tried it on the sparkle pumpkins but they didn't turn out so well....I might use those for another project!)
Once completely dry, apple your crackle medium (you can find it by the acrylic paints). I let the pumpkins completely dry overnight. I mixed up my blue paints to the perfect color and started painting away. Once dried, I sprayed them with a clear satin gloss spray paint I had on hand.

One thing I did that I wouldn't recommend is not painting the entire pumpkin. I did the tops of them and then let dry so I didn't have to hold them. Well....I ended up mixing more paint and the color wasn't the same. According to the tutorial I followed, you can speed up the process using a hair dryer. I'll make better note of that point next time!
Here they are on in my house. I don't have a fun mantel to decorate each season but I do have a piano so that is their current resting spot! :)

Subscribe to:
Posts (Atom)